Hi folks, this is CCS.
Today I want to share a real test I’ve been running with the new IAMCCS_nodes, inside a meaningful audio workflow, putting the brand-new Qwen3-TTS side by side with Chatterbox-VL.
Link to the new nodes post: https://www.patreon.com/posts/iamccs-nodes-new-149700645

I care about audio more than most people assume. Not as a technical accessory, but as a narrative force. Timing, pauses, breath, cadence — these are not details. They are structure. If you’ve edited films, you know that sound often dictates the cut, not the other way around. That’s why text-to-speech is becoming central in AI cinema workflows, whether we like it or not.

Qwen3-TTS immediately caught my attention because it doesn’t try to impress. It’s clean, stable, and predictable. The articulation is clear, the prosody holds together even on longer passages, and — most importantly for me — the timing is consistent. That matters a lot when you start thinking about sync, montage, or later integration with image-to-video systems.

Chatterbox-VL, on the other hand, has a slightly more expressive personality. Sometimes that’s an advantage, sometimes it’s a limitation. Its pacing can shift depending on sentence structure, which can be beautiful or problematic depending on what you’re doing. The point of this test is not to declare a winner, but to listen to how different models behave under the same conditions.
Best thing: the chance to use emotions in the text. Using for wxample the Turbo Model with Expressions you can use in your prompt Supported tags: [laugh], [sigh], [gasp], [chuckle], [cough], [sniff], [groan], [shush], [clear throat]
Link to the node: https://github.com/filliptm/ComfyUI_Fill-ChatterBox.git
Last but no least: I’ve inserted also Whisper transcripting module linked to the tts nodes. You can choose to enable it or not.
Link to the node: https://github.com/melMass/comfy_mtb.git (Model auto-downloaded)
QWEN3-TTS MODELS downloading instructions

You just place the Qwen3-TTS models where ComfyUI expects them and move on.
Here’s the links:
ComfyUI-Qwen-TTS (in custom nodes)
https://github.com/flybirdxx/ComfyUI-Qwen-TTS
Install the requirements for the new custom nodes.
Start, CMD, cd to the ComfyUI embedded Python directory, then…
(your comfyui address) /python.exe -s -m pip install -r C:ComfyUIComfyUIcustom_nodesComfyUI-Qwen-TTSrequirements.txt
(Replace ComfyUI_portable with whatever your local path is).
Qwen3-TTS 1.7B models download:
hf download Qwen/Qwen3-TTS-12Hz-1.7B-Base –local-dir ./Qwen3-TTS-12Hz-1.7B-Base
hf download Qwen/Qwen3-TTS-12Hz-1.7B-CustomVoice –local-dir ./Qwen3-TTS-12Hz-1.7B-CustomVoice
hf download Qwen/Qwen3-TTS-12Hz-1.7B-VoiceDesign –local-dir ./Qwen3-TTS-12Hz-1.7B-VoiceDesign
Qwen3-TTS 0.6B model download:
hf download Qwen/Qwen3-TTS-12Hz-0.6B-Base –local-dir ./Qwen3-TTS-12Hz-0.6B-Base
hf download Qwen/Qwen3-TTS-12Hz-0.6B-CustomVoice –local-dir ./Qwen3-TTS-12Hz-0.6B-CustomVoice
Qwen3-TTS-Tokenizer-12Hz
hf download Qwen/Qwen3-TTS-Tokenizer-12Hz –local-dir ./Qwen3-TTS-Tokenizer-12Hz
The only thing I want to stress — because it’s a recurring source of confusion — is SoX. Installing the SoX executable alone is not enough. You also need the Python-side installation, because the audio pipeline relies on it internally.
Windows exe part:
https://sourceforge.net/projects/sox/files/sox/

After installing SoX on Windows, you must add it to your system PATH.
Go to
C:Program Files (x86)sox-14-4-2
and copy the folder that contains sox.exe.
Then:
-
Open Environment Variables
-
Edit Path (User or System)
-
Paste the SoX folder path
-
Confirm and close all dialogs
Open a new Command Prompt and verify:
sox –version
After installation, You need also python part:
open cmd and type:
C:ComfyUIComfyUIpython_embededpython.exe -m pip install -U pip
C:ComfyUIComfyUIpython_embededpython.exe -m pip install sox
Verify with:
C:ComfyUIComfyUIpython_embededpython.exe -c “import sox; print(‘sox python ok’, sox.__version__)”
Bang. All is done ! You’re ready to play with!
Befor diving into the workflow, please git clone IAMCCS_annotate from the repo for further instructions and IAMCCS-nodes. For other used nodes, download them through ComfyUI manager.
LTX-2 models instructions: check my previous posts: https://www.patreon.com/posts/ltx-2-long-image-148682104
Tips: for better results, use the Lightricks/LTX-2-19b-LoRA-Camera-Control-Static: https://huggingface.co/Lightricks/LTX-2-19b-LoRA-Camera-Control-Static/tree/main
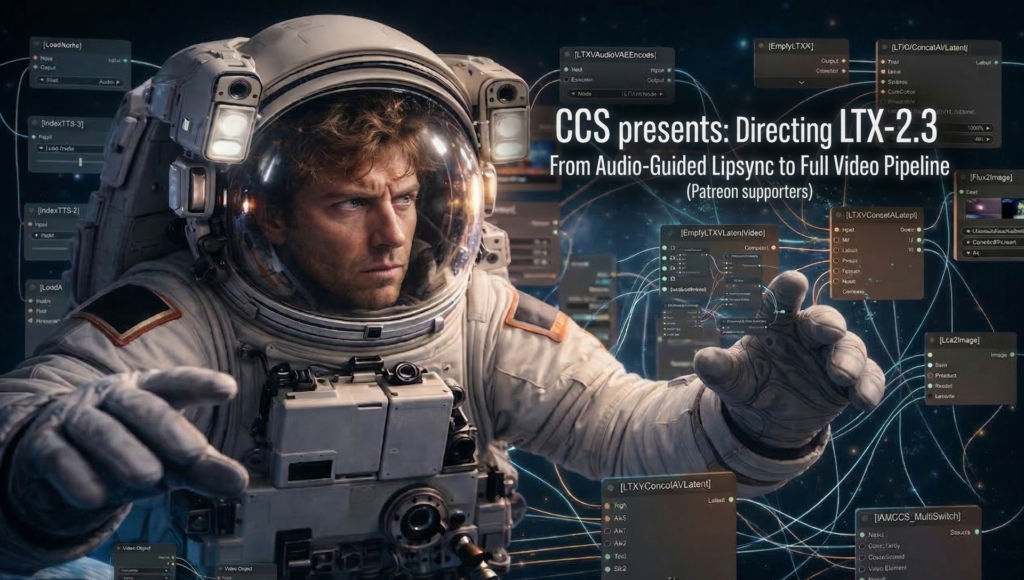
Inside the workflow: how Qwen3-TTS and IAMCCS_nodes actually work together

The IAMCCS_nodes in this workflow are not here to show off features. They’re here to enforce clarity. Grouping, clean signal flow, readable logic. I’m obsessed with this, probably because I come from cinema and not from software engineering. When a workflow becomes unreadable, it becomes unthinkable. And once you stop thinking clearly about a pipeline, you stop being able to control it.
-
Choose your models between high vram and low vram models thanx to the bus group

-
load your image, choosing the resolution and type your prompt

-
choose the audio pipeline (custom, qwen3-tts or chatterbox) from the multiswitch. (You can use also the macro, choosing for example QWEN3-tts plus transcript module, or creating one of your own.

The QWEN3-tts module:

Chatterbox module:

-
Set the HW supporter by clicking the HW probe and apply (experiment here, the suggestion is only a starter guide)

-
Use the autolink module to set the workflow clean!

before autolink:

after autolink:

Audio preprocessing block
This is where the audio is prepared before it ever touches the video side.

The raw audio is normalized, resampled, and passed through the preprocessing chain, including MelBandFormer and related feature extraction steps.
At this stage, we’re not generating anything yet — we’re shaping temporal information: rhythm, emphasis, pauses, energy. This is crucial because whatever happens later in motion is only as good as the temporal signal extracted here.
https://github.com/kijai/ComfyUI-MelBandRoFormer.git
model: https://huggingface.co/Kijai/MelBandRoFormer_comfy/tree/main
The sampling part (You can use the native sampler if you want to)

VAE with HW probe for the best settings for your hardware

tips: for very low vram users: you can use the IAMCCS VAE decode .- disk (frames, low RAM) saving frames to decode to disk (but be prepared, it’s slow)

Final video (example)
The video was generated using the duration formula without the “+b” offset — a full explanation will follow in the next insight post.
CONCLUSIONS
This is just Version 1. In the next iteration, things will expand significantly: more TTS models, RVC models, image generation via Z-Image, and a much more articulated discussion of timing, sync, and structure.
That’s where diagrams, PDFs, and deep technical breakdowns will come in, because at that point the complexity really deserves it.
And if this kind of work helps you — if it saves you time, or makes you think differently about how sound and image interact — supporting me here on Patreon is what allows me to keep doing this openly, slowly, and properly.
More soon.
CCS