Hi folks, this is CCS.
Today we’re diving into LTX-2.3, the latest evolution in high-efficiency video generation. While WAN 2.2 excels in raw cinematic fidelity, LTX-2.3 is the undisputed king of speed and structural flexibility. It’s built on a DiT architecture that allows for incredibly fast inference without sacrificing the spatial consistency we need for professional work.

The standout feature of 2.3 is its improved conditioning responsiveness. Whether you are working with image-to-video or text-to-video, the model adheres closely to your input geometry, making it the perfect partner for the goyAIcanvas I’m developing. It handles complex camera movements—pans, tilts, and dollies—with a fluidity that feels intentional rather than randomized
Here are a few examples I’ve managed to output with this new setup. I’ve had so little time to play with it so far, but I’m already brainstorming the possibilities! (Everything shown here was generated using the included workflow):
-
IMAGE TO VIDEO: The first video Features one of my original characters, whom I first designed as a 2D concept and then brought to life in ‘real’ space.
WHAT YOU NEED INSTALLED
To run the LTX-2.3 pipeline with GGUF optimization or diffusion models / the full feature set, ensure your environment is up to date and the following assets are in place.
TIP #1
The workflows for running LTX-Video 2.3 models require updates. Before you proceed, I strongly suggest backing up your ComfyUI portable folder—specifically the python_embeded, ComfyUI, and custom_nodes directories (you can skip the models folder to save space). This way, if something breaks, you’ll always have a backup to revert to your working configuration. It might seem like a waste of time, but I assure you, it’s not!
1. CUSTOM NODES
-
ComfyUI-GGUF: github.com/city96/ComfyUI-GGUF
-
IAMCCS-nodes: github.com/IAMCCS/IAMCCS-nodes
2. CORE MODELS (GGUF)
-
LTX-2.3 GGUF (Unsloth): huggingface.co/unsloth/LTX-2.3-GGUF
-
LTX-2.3 Distilled GGUF (QuantStack): huggingface.co/QuantStack/LTX-2.3-GGUF
-
LTX-2.3 complete original files: https://huggingface.co/Lightricks/LTX-2.3/tree/main
3. TEXT ENCODERS & EMBEDDINGS
-
Gemma-3 12B GGUF: huggingface.co/unsloth/gemma-3-12b-it-GGUF
-
LTX-2.3 Specialized Embeddings: huggingface.co/Kijai/LTX2.3_comfy
Path: Place all text encoder and embedding files in ComfyUImodelstext_encoders
4. VAE & UPSCALERS
-
LTX-2.3 VAE: huggingface.co/Kijai/LTX2.3_comfy/vae
-
VAE preview: https://github.com/madebyollin/taehv/blob/main/safetensors/taeltx2_3.safetensors
-
Audio VAE: huggingface.co/Lightricks/LTX-2.3
-
Path: ComfyUImodelscheckpoints
-
-
Upscale Model: huggingface.co/Lightricks/LTX-2.3
-
Path: ComfyUImodelslatent_upscale_models
-
TIPS #2
You can set a personal path to your local model via extra_model_paths.yaml, which you can find in the ComfyUI folder. I’ll cover this and other basics soon in the upcoming ‘Foundations’ series posts. Stay tuned 🙂
******OH, ALMOST FORGOT! 💡***********
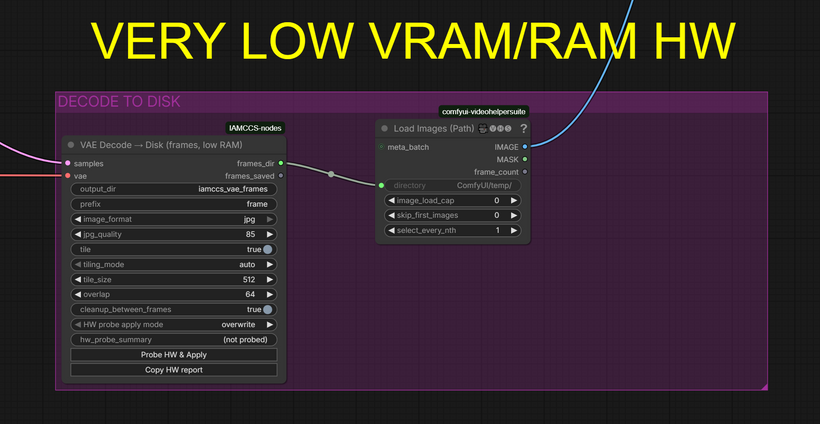
We’re going to use the IAMCCS VAE Decoder (already included in IAMCCS-nodes)! Today’s workflow features VAE Decoders from the IAMCCS suite with a specific functionality: by clicking the “Probe” button, the node detects your GPU, video duration, and resolution, automatically applying the optimal settings for a successful generation. (However, you can also leave the settings as they are to test it manually.)
Refer to the instruction table below:

This way, even low VRAM cards like the 3060 can generate 10-second 1080p videos without any freezing!
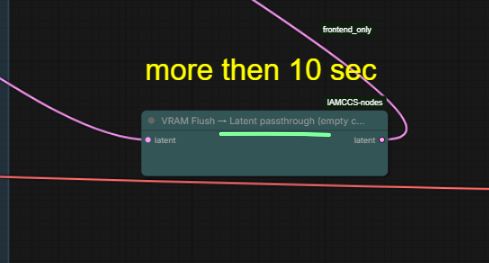
If You got a lower vram card and You want go ahead (for example 13 sec) you can use the VAE Decode to Disk plus the new VRAM FLUSH node.
Attached You’ll find the second workflow version with the nodes already configured! You can go up 13 sec at 1080!
Update IAMCCS-nodes to grab it
Update IAMCCS-nodes here: github.com/IAMCCS/IAMCCS-nodes
____________________________
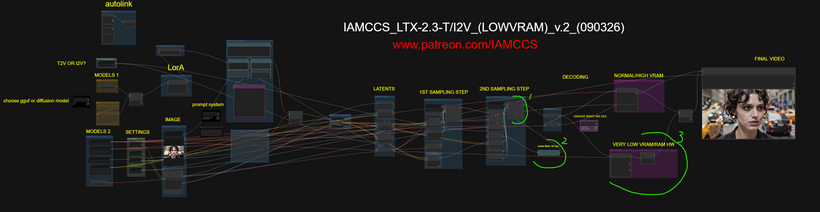
WORKFLOW
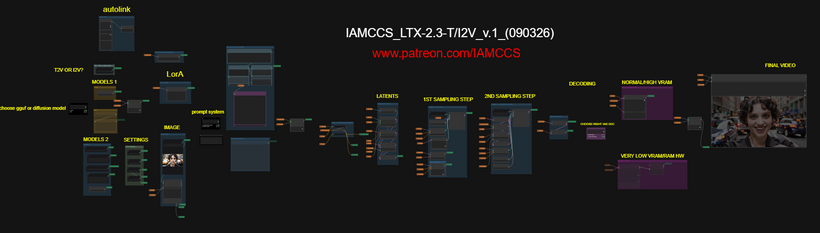
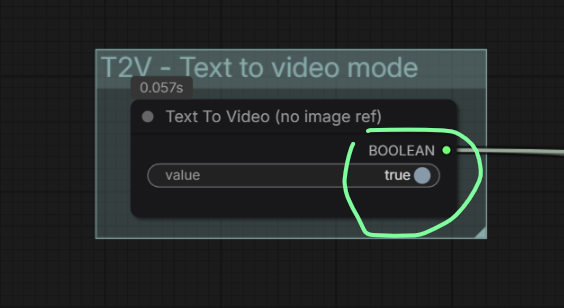
You can choose I2V or T2V from here:
Most of the details regarding the workflow logic and construction have already been covered in my previous post, so I won’t repeat myself here. If you missed it, you can check it out again here: LTX-2 PREVIOUS POST
What’s New in this Version:
-
Enhanced Definition & Audio: You’ll notice much higher definition and improved audio. While the audio might not yet production-ready, it’s a great reference track to use for inspiration or as a guide for your final sound design.
-
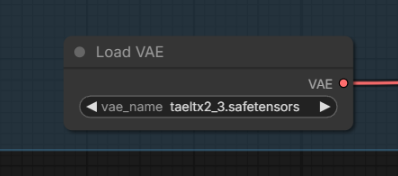
Fast Previewing: I’ve integrated a Tiny VAE into the workflow for a lightning-fast (albeit pixelated) decoding preview.
Hardware & Performance:
The beauty of this model is its scalability. You can push the resolution up to 1920×1080, though performance will naturally depend on your hardware (VRAM and system RAM).
-
Recommended Entry Point: At least an RTX 2060 or 3060 series GPU.
-
Memory: 32GB of system RAM and 8GB to 12GB of VRAM (more is always better).
-
Duration Bonus: Another major advantage of LTX is the clip length (up to 20 seconds). While results vary by card, on average, you can generate about 10 seconds of video at 1920×1080.
Workflow Cleanup:
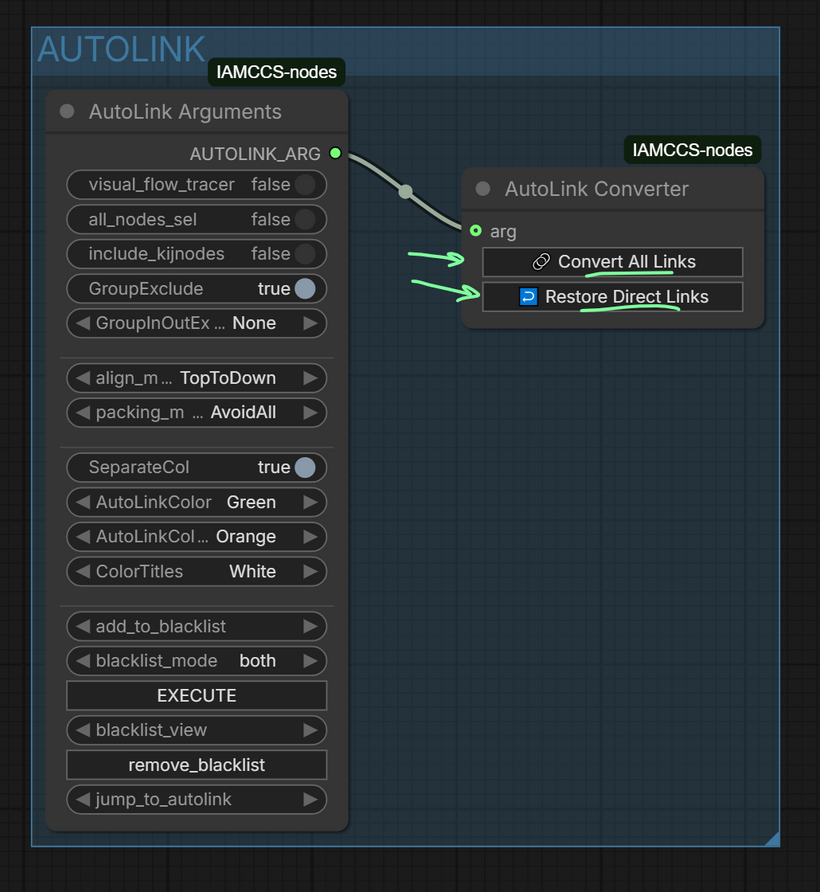
I’ve included several utilities from IAMCCS_nodes, including the AUTOLINK feature. This allows you to keep the workflow clean and organized, but you can “bring back the spaghetti” whenever you need to see the full pathing using the Convert all links / Restore direct links function: github.com/IAMCCS/IAMCCS-nodes
LOW VRAM USERS V.2 VERSION WORKFLOW
What I changed here (to allow 1920×1080 10 sec (13 sec is probably the safest limit without OOM):
-
a node to clean latents between the samplers
-
I left the preview only to the first sampler
-
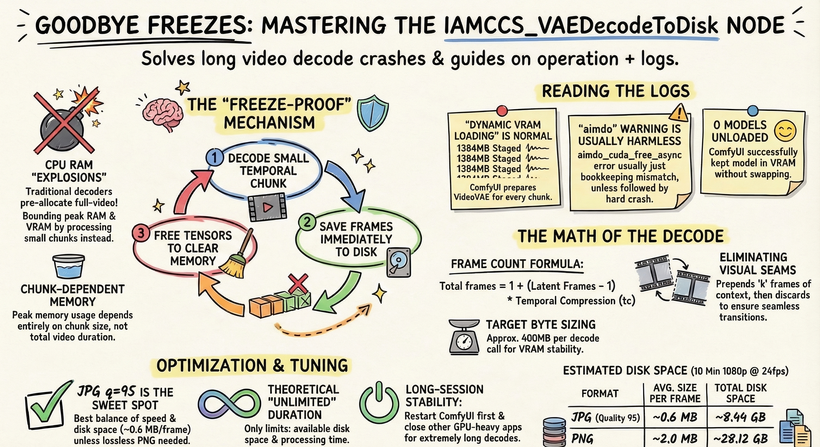
and final step: the VAE DECODE TO DISK!
Refer to the instruction table below:
-
Here is a 13 sec demo using the VAE decode to disk
Conclusion
LTX 2.3 is fantastic. Who would have thought a consumer PC could generate 1920X1080 video with audio? It’s an incredible tool for major projects. I’ll be stress-testing it properly very soon to see exactly how much I can squeeze out.
In my opinion, Wan 2.2 still has a much more cinematic feel. However, among the other posts I’ll be releasing this month, I’ll definitely cover some breakthroughs on this model—specifically whether we can integrate it into a filmmaking pipeline, testing it with ControlNet, a long 5-segment length workflow (using IAMCCS_LTXMotionExtender) and a head-to-head audio battle with Infinity. We shall see!
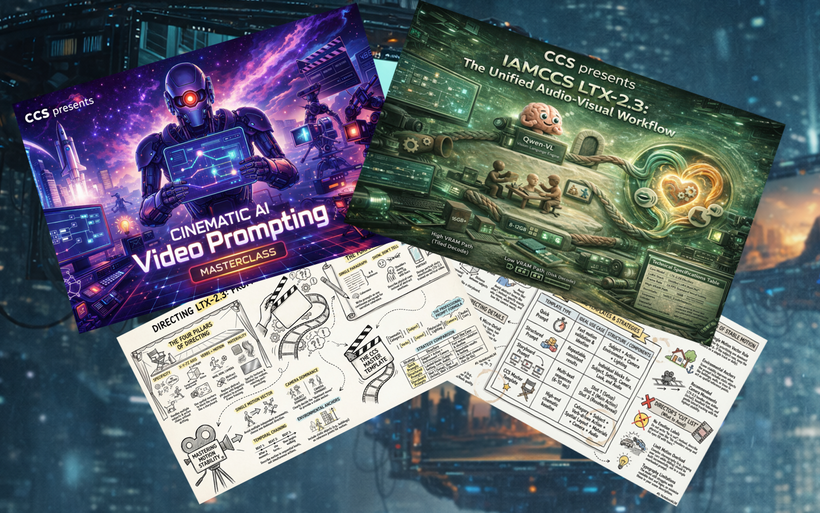
In the meantime, get ready: a Prompting Masterclass for LTX-2.3 and a special Breakthrough LTX-2.3 workflow are coming soon. The release will include a full walkthrough focused on mastering the internal processes of the video generation pipeline.